
By Jim Duda
 Like you, I share an interest in windmills, caused by so many different things, depending on who we are. Whether it’s from good memories of youth, their simple majesty against a dawn or dusk sky, or perhaps we owe our life to the water they supply…windmills are neat, groovy, or cool, depending on your generation.
Many of us would like to put one in our yards for just as many reasons, but many of our yards are just too small for a "real" one. We have a small yard (100 ft. X 150 ft.) so the only way I could watch a mill turn in the breeze was to build a miniature. There seems to be nothing between the garden toy type and a 6' real water pumper so I tried to convince a large windmill manufacturer to build a 3 foot wheel diameter model but was unsuccessful…I still believe there is a market for them, but that's another story.
That's the reason I decided to attempt this and I will gladly share pictures and any successes (and failures!) to anyone that wants to build one. I can send ZIP files in .jpg format if you give me your e-mail address. They run about 350 KB – about a 5 minute download @ 28800 modem rates.
I owe my miniature to many folks in the windmill community and it would be wrong if I neglected to mention them (in alphabetical order):
I think it's a great size for the typical yard.
THIS VERSION HAS NO WATER PUMPING MECHANISM IN IT. I'm hoping someone out there will either build one or share their experience in building one.
I saw the handpump on Ellen's Website and knew immediately it would look nice under my 11 foot tower. I modified it slightly by adding pipe plugs to the bosses that are already cast into the main barrel, and replacing the ¼" round piston rod with a flat one 3/16 thick X ½ wide. To achieve the "rusty weathered" look, (it is bright red when purchased), I used Floquil model railroad paint (lacquer based) in 3 basic colors: Rust, Roof Brown, and Weathered Black. I used both internal and external mix Binks and Paasche airbrushes to apply it. The pump is very authentic and very well made – fairly easy to modify – really!
I have documented what I did to modify the pump in two ZIP files, one is 367 KB and the other one is 190 KB. They may give you some ideas for modifying yours.
Remember, I have no plans for it, as such, just .jpg images I’ll be glad to share.
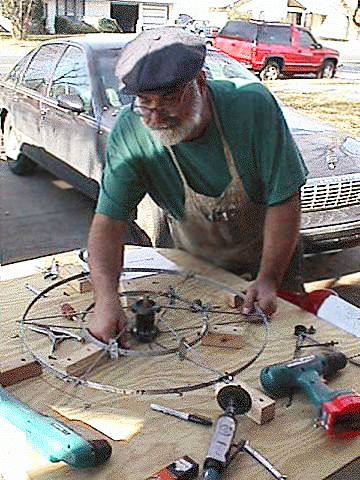
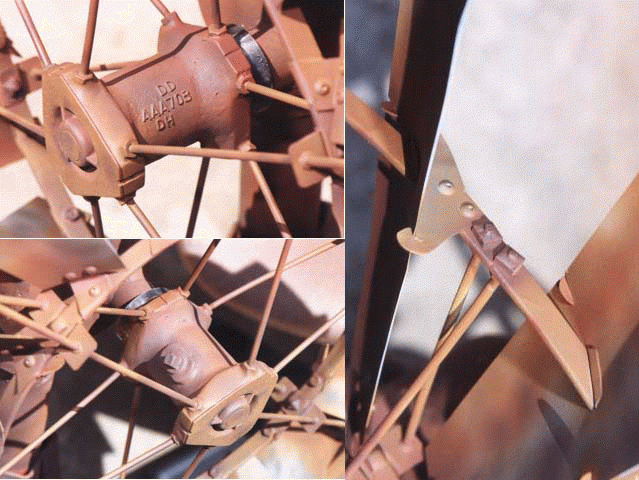
The hub is critical. I suggest you have access to a lathe, MIG welding equipment, drill press, drill press vise, and various sizes of pipe. The bearings I used were Koyo 6203 series, .625 in. ID, 1.575 in. OD, sealed ball type.
Inner and outer bands were made from 1/8 in. X ½ in. flat cold rolled steel, spokes from 5/32 round cold rolled, with 8-32 threads on both ends. Those compound angles for the 12 spokes on the hub were quite challenging and were done freehand…get to know a machinist! Drill and tap them 8-32 for the spokes. Sails and ribs are .023 galvanized sheet. A scroll saw worked best for cutting out those 18 sail ribs – figure one blade will last for 2-3 ribs. Use square nuts for authenticity if you can find them – most bolt houses should be able to get them in sizes up to 10-24. True the wheel just like you do a bicycle wheel – having a nut on both sides of the outer rim makes it easy (well, sort of…) Mine ended up within 1/32 in. both in concentricity and run out...after 2-3 hours of truing it, I decided that was close enough! Use a thread locking compound on ALL nuts and screws (I like the red Permatex/Locktite Industrial High Strength ThreadLocker #81791) – to prevent wheel parts from flying all over the neighbors' yards.
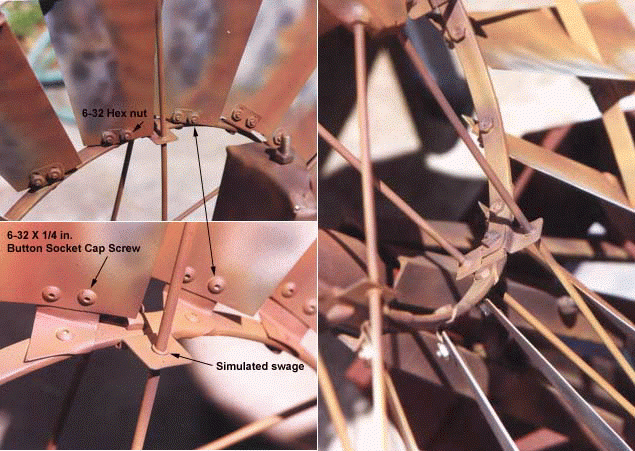
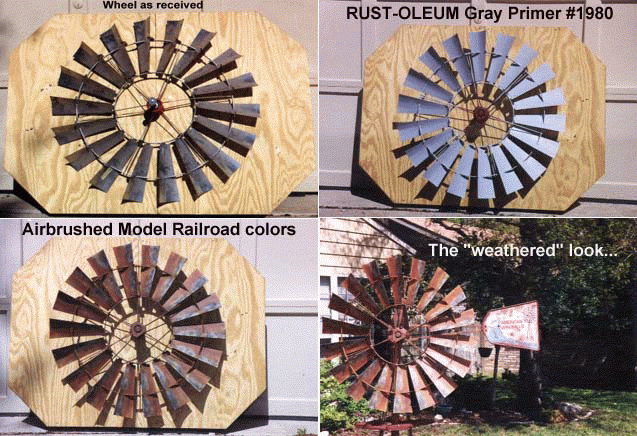
Appearance...your choice. The easiest way is to leave it in the natural galvanized state. My brother, Douglas, has a 602 that is at least 50 years old and shows it proudly. I wanted to build the miniature version of his so I "weathered" mine using Floquil (lacquer based) model RailRoad paint. You can get close by using just 3 colors: Rust, Roof Brown, and Weathered Black. Thin with Lacquer Thinner 10%. The Paasche external mix airbrush using 10 lb. pressure works fine.
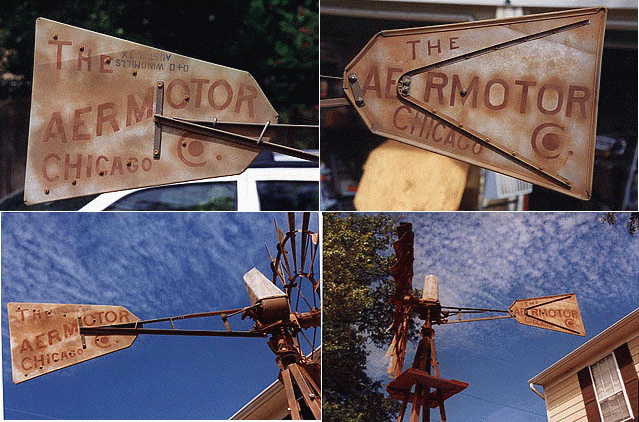
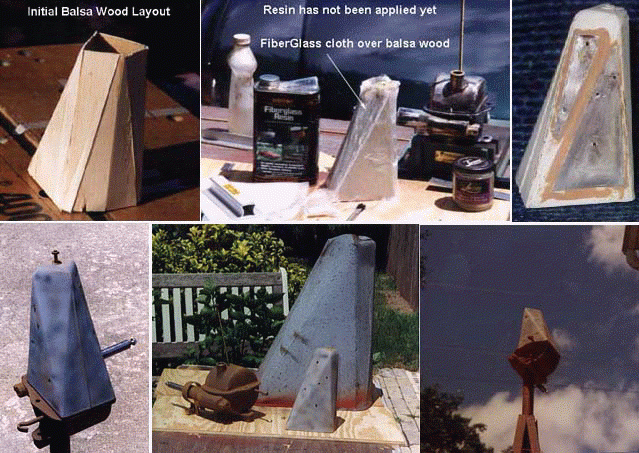
Since most 50-year-old windmills are scarred with bullet and shotgun pellet holes, I attempted to replicate them by using an old ice pick (remember those?). Thin sheets of aluminum were laminated to the balsa/fiberglass shell so the "in" and "out" effects of bullets could be simulated by punching through it. Rust-colored model railroad paint was applied around the inside of the holes to complete the effect.
The brake follows the Aermotor design completely. The parts were made on a Sherline miniature lathe and are shown in the thumbnail. Steel strapping .028 inches thick was used for the brake band. Pushing against the little brake cup and moving it 1/4 inch stops the wheel and locks it up very nicely.
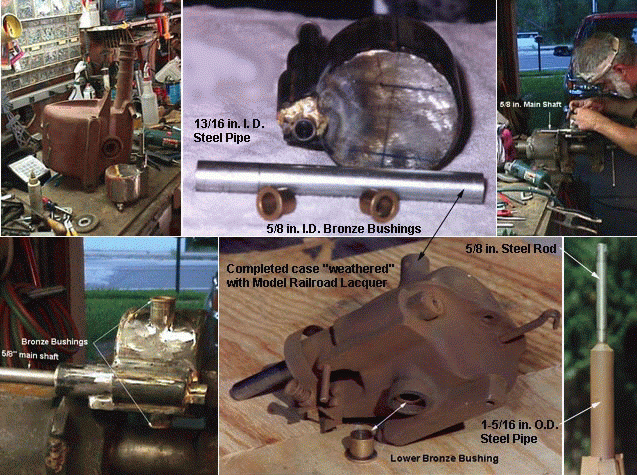
The gear case is made from various sizes of pipe, welded and/or brazed together. The wheel shaft is 5/8 inch steel rod welded to the front of the case and the vertical pipe provides the support for the bronze bushings that fit another piece of 5/8" rod that is welded to the mast pipe. This method follows the principle used in the real ones.
I built the vane buffer (shock absorber) first because it limits the swing of the tail in the fully furled (folded) and unfurled positions which is necessary to make sure the "throws" of the furling and brake levers are correct. Like the brake, it follows the Aermotor design faithfully and works exactly like the real one. Part numbers "654" and "655" were added to the two halves using the solder method described earlier in this article. The vane spring is 7/16 diameter X 7 inches long X .041. There are five spring adjustment holes in the top flat tail bone as in the real one. Modeling this has made me appreciate the elegant simplicity and functionality of this design, believe me.
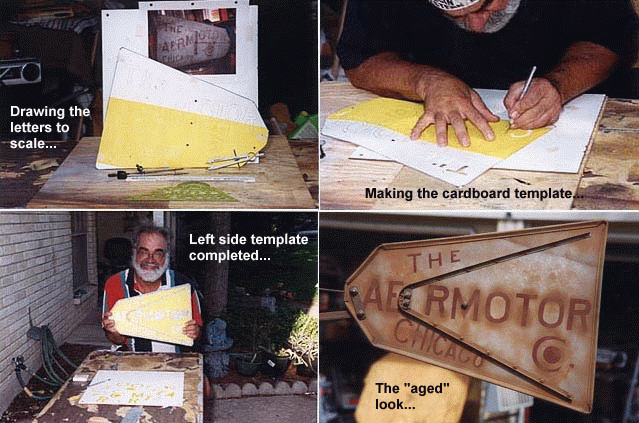
First, the wire frame was formed from 1/8" diameter. steel rod; then the sheet metal was formed over the wire with a bead roller. Since a bright, shiny vane would not look appropriate on my "aged" model, I soaked the sheet metal in a white vinegar and water solution which dulled it nicely. The logo is crucial and a lot of time was spent referring to photographs to get the lettering and placement correct. The letters were hand drawn on poster board stock and cut out with #11 X-acto blades – several were used. Frisket paper was placed on the sheet metal, and the letters were traced on it using the templates; then the letters were again cut out of the frisket paper (available from art supply stores) and removed. Letter color is a mixture of red, brown, and gray for that "faded red" effect applied with an airbrush. Finally, a coat of rust was shot over everything to weather it. The vane dimensions are EXACT scale...I have the measurements if you need them.


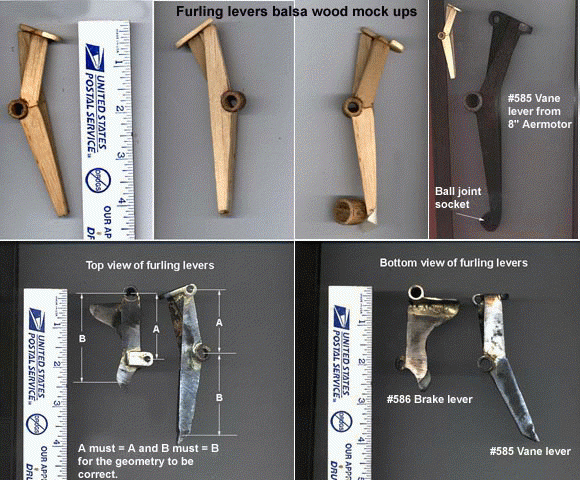
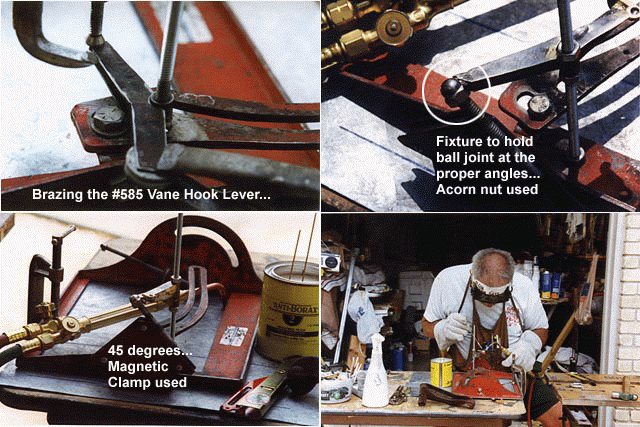
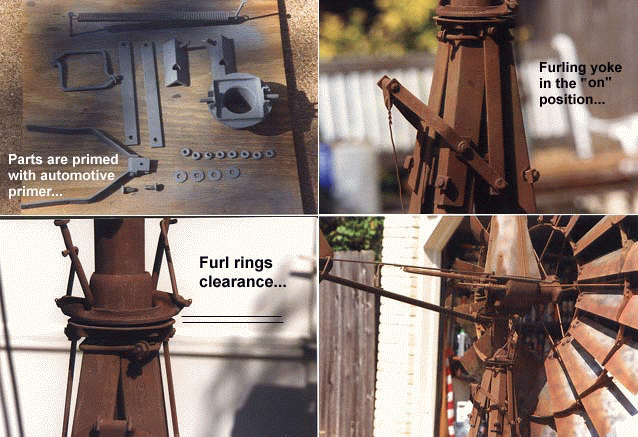
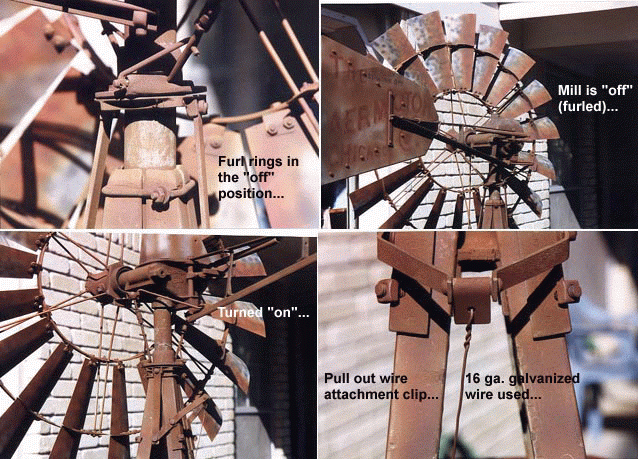
Those tricky and formidable furling parts...when I started this model almost exactly a year ago, I knew the toughest challenge would be to build the furling levers and linkages and make them work like they should. My method was to use balsa wood and thin plywood for the mock-ups, mount them on the gear case, and keep modifying them until I was satisfied. When everything was functioning properly, I cut the wood pieces apart, traced them on the steel, had Big Dave cut them out with his plasma cutter, and brazed them together. I was surprised at how little pressure is needed on the lower pull out handle to furl this (turn it off)...more testimony to the elegance of the original design almost 100 years ago.
The last and final group of pictures will show the complete model with the wood sucker rod attached to the mill and the pump. I have the perfect setting in mind, but it’s 50 miles away and I’m not sure if the property owners will let me photograph it there...if they do, it should make an interesting picture!
When I started this project I had an image in my mind of how I wanted this to look in our back yard and I think it comes pretty close to that. I still think it's the perfect size for a lot of folks and hope you have enjoyed following the construction phases over the past year. I also hope you like these final pictures and thank you, Ellen, for letting me share this with everyone.
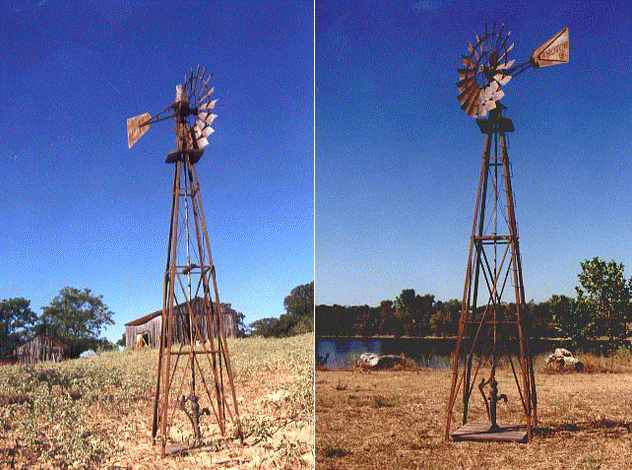
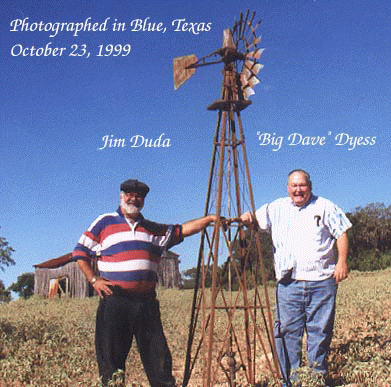
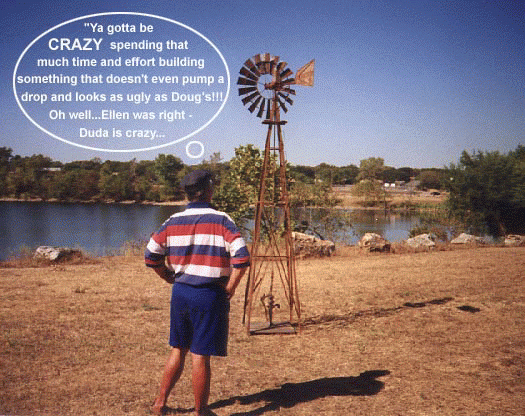
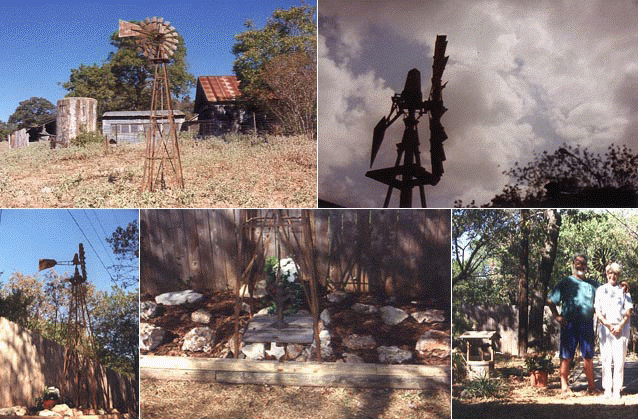
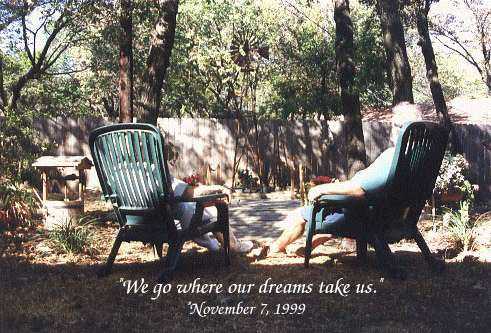
Finally, remember this DOES NOT PUMP WATER...I'm hoping someone with the machining skills and equipment will take it to that level.
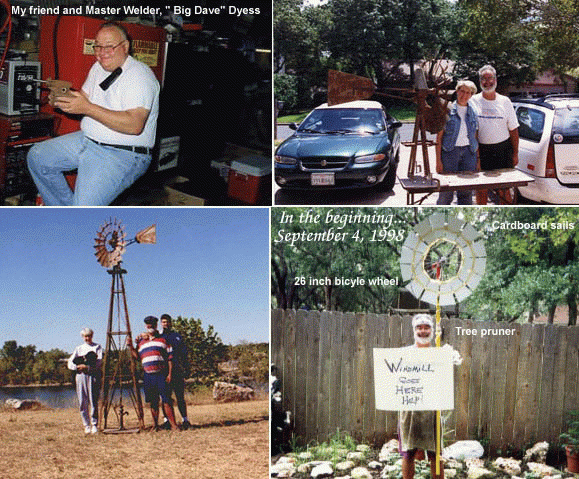
Rest in Peace Jim. You were a gentle soul.
I can't cook, and I can't sew
And I can't make the flowers grow.
I can't be pretty, I can't be cute
I can't do math, I can't compute.
This little mill is gettin' tough
To do the wheel won't be enough.
That furling stuff, a working brake
Is one big statement I wanna make.
Undaunted, still, I forge ahead
I'll finish this before I'm dead.
I hope that someone will follow me
And take it to the next degree.
Build a pumper that looks like mine
I really think that would be fine.
Gears, and pitmans, a guide wheel too
So much to do, before I'm through...